A trampoline is a fun but expensive investment for the family, so it can be a little devastating if it tears. While it can get years of use, when or if it tears, it can be a heavy hit to your wallet as you lose a pricey investment that your family has enjoyed. Instead of taking apart and hauling out a trampoline that only has minor tears or holes (or even some broken springs), utilize the trampoline repair kit your trampoline came with, or invest in a new trampoline repair kit. It will not only save your wallet from a new trampoline or a professional service but can also save you time in the long run as well.
What Is a Trampoline Repair Kit?
It may be hard to picture exactly what a trampoline repair kit is and what exactly it can do. These kits often come with the trampoline and focus on holes and tears that are a danger for those using the trampoline. It is important to know, though, that at a certain point the tear will be too big for you to fix safely at home — you’ll need to order a new mat instead. For those that are safe to fix, though, we’re going to go over exactly what’s needed and how it’s done.
What Can a Trampoline Repair Kit Do?
A trampoline repair kit can offer a few different fixes: holes and tears in the mat, tears in the net (if there is one), and problems with the trampoline’s springs. While there are limits with each of those, there is a lot you can do yourself with each of them as well. We’ll go through each type of potential damage. It is important to know that not all holes in the net or mat need to be fixed. Anything smaller than about 2/10 of an inch (about the size of a pencil) doesn’t need to be repaired.
When Is the Trampoline Mat Unsalvageable?
If you have a tear larger than 2-3 inches, you’ll need to replace the mat. It may not seem like a large enough tear to be worth replacement, but with older kids on the trampoline, especially older than 12, this tear will only get bigger. This is especially true if it is near the center of the trampoline mat.
If your trampoline has multiple tears or holes in it, you will need a new mat as well. This is more likely to happen with older trampolines and is likely a sign of wear that can signal unsafe conditions for jumping. After the third hole (depending on size and the age of users), consider replacing the mat.
Fixing Trampoline Holes and Tears

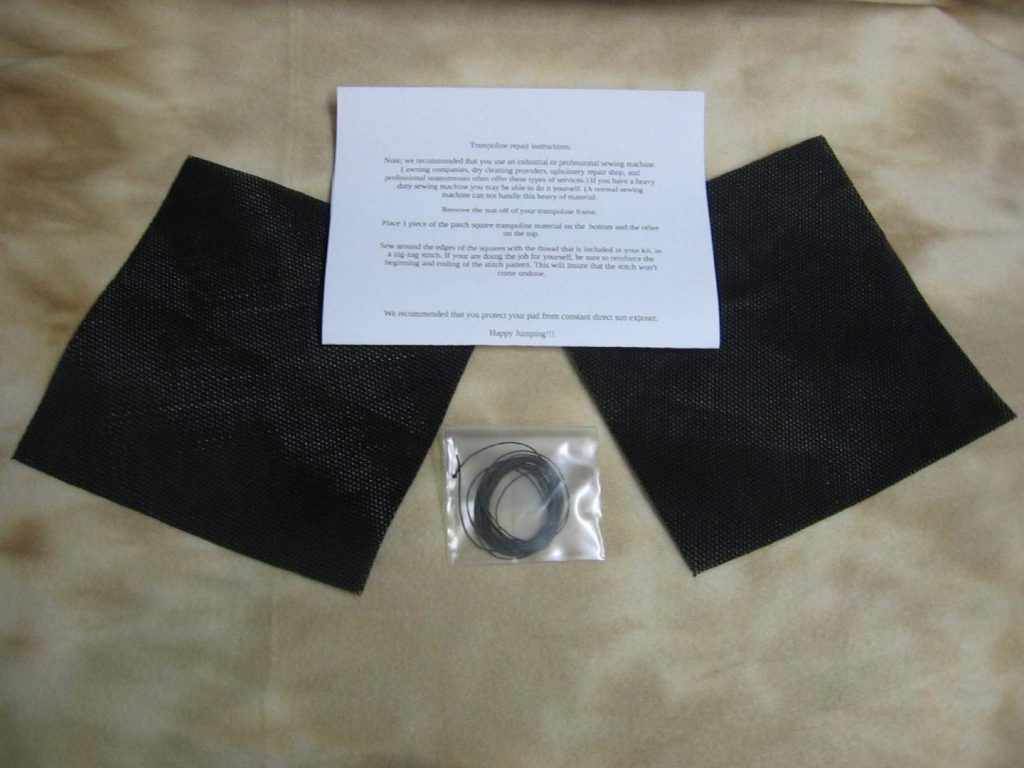
These can be holes and tears in the mat or the netting. A trampoline repair kit will come with replacement strips or pads of mat that can either be attached with adhesive or sewn on, depending on the size of the tear or hole.
Using Adhesive to Repair a Trampoline Tear or Hole (Mat)
For smaller holes, attaching an adhesive piece of mat, canvas, or outdoor vinyl fabric is the best and quickest fix. Trampoline repair kits will often come with various sizes of this material and offer strong adhesive that prevents small holes from getting larger. If they don’t have adhesive, you can purchase trampoline glue from Amazon for a good price.
To patch a hole or tear with this method, you’ll need one piece of fabric. Using adhesive or trampoline glue, glue around the edges heavily and leave it to dry for at least a day before allowing anyone on it. One thing to note about this method of repair is that the glue or adhesive will probably leave a lumpy or raised portion behind. While this shouldn’t be a danger or interfere with jumping, it is less clean than sewing.
Using a Sewing Kit to Repair Holes or Tears (Mat)
This is the cleaner way to repair a trampoline mat — though it is less convenient for sure. You’ll need to take the mat off the trampoline in order to make this patch — a feat in and of itself sometimes. You’ll also need a canvas-approved sewing needle along with mat pieces (or the previously mentioned canvas or outdoor vinyl fabric).
It is easiest to accomplish this method with a sewing machine. As you’re sewing, you’ll want to be sure to go over it multiple times and then trim any excess material to get the smoothest and cleanest transition from patch to mat. Unlike the adhesive method, which just takes a waiting period more than anything else, this method takes labor hours. The tradeoff is that the mat is ultimately ready to use as soon as you’re done.
Patching the Net of the Trampoline
There are two methods to patching the netting of a trampoline: slow and clean, or fast and dirty. Which you use depends on your personal taste (and amount of time available), as well as how bad the tear is. In both cases, you’ll need to remove the netting first.
1. Slow and Clean
This method requires two patches — they can be made of replacement netting, mat, canvas, or outdoor vinyl — a canvas sewing needle, and thick fishing yarn (and a sewing machine, preferably). The two patches are for each side of the net. You’ll use both patches to sandwich the tear and then sew around the edges (similar to the mat patch), trimming excess afterward.
2. Fast and Dirty
This is better for smaller tears in the netting as it is not as long lasting (and much more noticeable if that matters to you). Duct tape can be used to create a patch if you don’t have the material or time to sew one on. Like the previous method, you’ll want to use duct tape on both sides of the net over the tear — and you’ll want to do multiple layers to bolster its longevity and safety.
As an aside, duct tape can also be used for very small holes in the mat in the same way – however, this is not recommended for long-term use as you’ll be better off with a patch for safety.
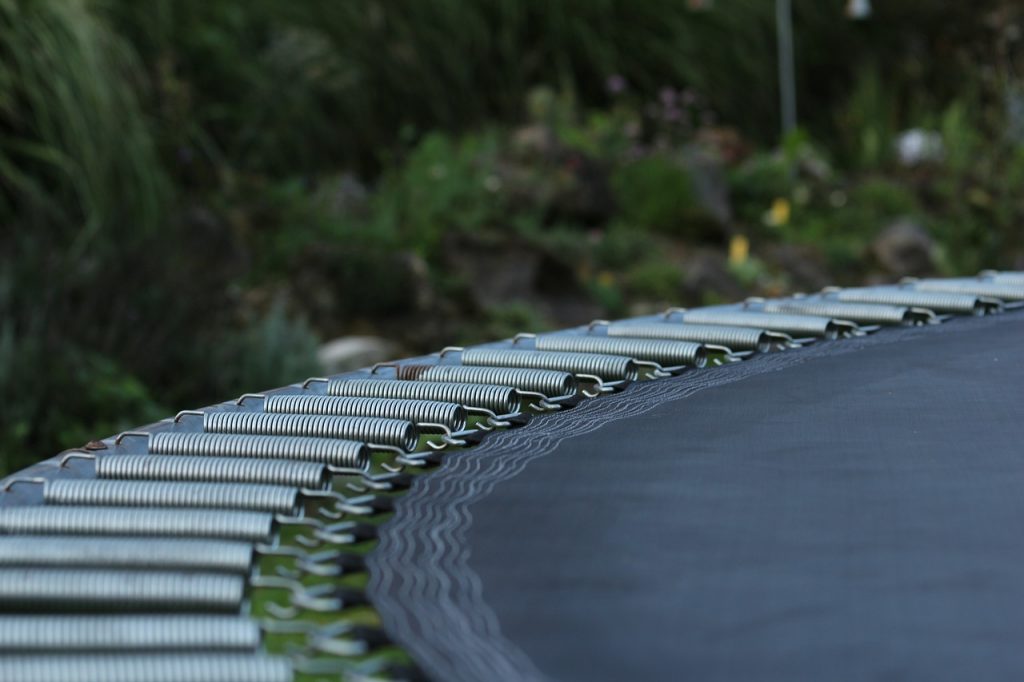
Fixing Trampoline Springs
The trampoline springs are definitely the more mechanical portion of the trampoline, but don’t worry — your trampoline kit should have some tools and supplies for you in this area, too. Aptly named the Trampoline Spring Tool, this should be included in your trampoline repair kit and will be a lifesaver in this fix. If you don’t have a kit, or yours didn’t come with a tool, you can buy one on Amazon for a good price.
Some Things to Keep in Mind
If you have a broken or damaged spring, you’ll need to replace it as there are no quick fixes in that department. Make sure you are replacing it with a trampoline spring as anything else will not suffice and will be a safety hazard to everyone using the trampoline.
Before purchasing a new spring (if your kit did not come with spares), make sure it is the correct length for your trampoline, as different trampolines will use different lengths depending on the target age range of users, size, and level of bounce.
As tempting as it may be not to, you do need to remove the mat before replacing a spring. Trying to stretch a new and stiff spring from frame to mat will not end well and will likely be dangerous.
The repair tool itself will help you get the damaged spring out and put the new spring in (and the design of it will make a lot more sense once you set out to do just that). This should be a quick fix — the most time-consuming part will be taking the mat off and putting it back on.
Conclusion: Investing in a Trampoline Repair Kit
While most trampolines will come with a repair kit, they may not all be intuitive to use. Hopefully, these instructions have helped clarify the more vague areas. If you no longer have your trampoline repair kit (or never received one in the first place), then these instructions can be a guide to doing the repairs you can do safely without a professional and without throwing out the mat or netting.
It is important to keep in mind that safety is always the first priority when considering a repair (whether mat, net, or spring related). If you feel unprepared or uncomfortable attempting any of these methods, it’s best to consult a professional or take in the damaged part.
However, know that there are some aspects of repair that you can do on your own — given the right tools, equipment, and parts — so don’t give up on your trampoline if it has tears, holes, or spring issues that you can fix. It’ll be a lot less expensive than ordering a new trampoline and can be a much quicker fix than sending it in (or replacing the entire thing).
Leave a Reply